
First things first. A special thank you to Mod Podge Rocks for all the tips, ideas and inspiration. I visit the blog regularly, but have not attempted a real project until now. You won't believe the things that can be done with Mod Podge and fabric, or Mod Podge and just about anything else for that
 matter.
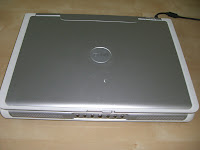
Those who know me know that I love black and white polka dots. In fact, you can find a bit of black and white polka in most of my quilts. Recently I bought some black and white polka coffee cups. I was sitting at my laptop, drinking a cup of coffee from my super cute coffee cup and a light went on - yes, it was inspiration. Off I went to the quilt shop for fabric and the hardware store for the wet sandpaper and steel wool, and a new project was started. With that said, I'm posting before and after pics of my laptop redo, along with a pic that shows all of the supplies I used.
Here's a quick rundown on the process that I used:
1. Apply the back side of the fabric with a coat of Mod Podge Gloss and let dry. (Note: This step is extremely important because it prevents the fabric from fraying when you cut it.)
2. Cut the fabric to size and applied a thin layer of Mod Podge to the top of the laptop.
3. Place the fabric, right side up, on the top of the laptop. Immediately use the edge of a credit card or something similar to smooth out the fabric and to remove any bubbles or wrinkles.
4. Wait 30 minutes.
5. Cover the fabric with a layer of Mod Podge; apply the first layer of Mod Podge from side to side. Wait 30 minutes.
6. Add another layer of Mod Podge; this time apply alternate the direction in which the Mod Podge is applied. Wait 30 minutes. Continue this process until about 5 layers have been applied.
7. After the last layer has set for about an hour, wet sand the fabric, wipe the top with a damp cloth and then with a dry cloth, and follow with 0000 steel wool. This will take the "bumps" out and make the top smooth. (Note: I learned that wet sand means you take a piece of the sandpaper, soak it in water for about 15 minutes, and then use the wet sandpaper.)
8. Repeat steps 5, 6 until you reach your desired number of layers of Mod Podge (my laptop has about 10 layers of Mod Podge) and then repeat step 7.
9. Tape off the areas that you don't want to varnish.
10. Finish with a coat or two of clear varnish.
11. Sit back and admire your handiwork!
If this inspires you, please drop me a note and let me know what you made, and send a pic if you can. And don't forget to visit Mod Podge Rocks.
Love this! I love polka dots so. Thank you for the mention!!!
ReplyDeleteomg - great idea! I'm thinking I've got to give this a try! Thanks for the inspiration!!
ReplyDeleteI think you are really on to something here! It turned out great!
ReplyDeleteDebbie, that looks beautiful! I always know dots make everything better, but I'd never thought about a laptop. Now I'm looking around for things to make over.
ReplyDelete