You can purchase Just Leaf It at Kim's
 blog, here.
If you visit Kim's blog, please be sure to leave her a comment and let her know that you heard about her here.
A blog about quilting and other fun stuff! Sure, my quilts are usually a bit out of square and one stitch off but who cares? It's the creative journey that counts. Join me as I share my latest quilting endeavors.
 blog, here.
 These rulers are intended for long-arm quilters and are made of Plexiglass so they are a bit more expensive than your regular stencil. However, they work great. I just used mine to mark cross-hatching on the baskets of my Bunny Hills BOM. Deloa has a free instructional video on her website... check it out!
 If you've followed this blog at all, you know that I teach a class on this sunflower and each time I make another. I decided to break out of my traditional rut and go for the polka dots. So here's a pic of the wall hanging in process. I still need to quilt it, but that will come. In 2010 I promise!


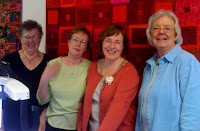
 of her friends threw a party this weekend to introduce their friends to Miss Meander, their new long arm machine. And do those girls know how to throw a party! Miss Meander has her own studio and it was beautifully decorated with quilts on the walls (what else?), beautiful flowers, a dessert table, and the laughter and sounds of friendships made through quilting. Four gals are the owners of Miss Meander and I predict they will all be quilting up a storm in no time. I am, of course, jealous.
